Cleaning solar panels requires just a few specialized tools and can be done safely in under an hour by most homeowners, preserving panel efficiency that typically drops 15-25% when dirt, dust, and debris accumulate. You’ll need a soft-bristle brush or squeegee, non-abrasive cleaning solution designed for solar panels, a hose with adjustable nozzle, and proper safety equipment if you’re working on a roof.
The investment in a quality cleaning kit pays for itself quickly. Clean panels convert sunlight into electricity far more efficiently than dirty ones, and understanding how solar panels work makes clear why even a thin film of grime blocks photons from reaching the photovoltaic cells beneath.
Most professional-grade solar panel cleaning kits range from $40 to $150 and include telescoping poles that let you reach rooftop panels from the ground, eliminating much of the safety risk. The right tools protect your warranty too, since manufacturers often void coverage when harsh chemicals or abrasive materials damage the anti-reflective coating on panel surfaces. This guide walks you through choosing the correct kit components, preparing your workspace safely, and executing a thorough cleaning that restores your system’s peak performance.
Why Regular Cleaning Matters for Solar Panel Performance
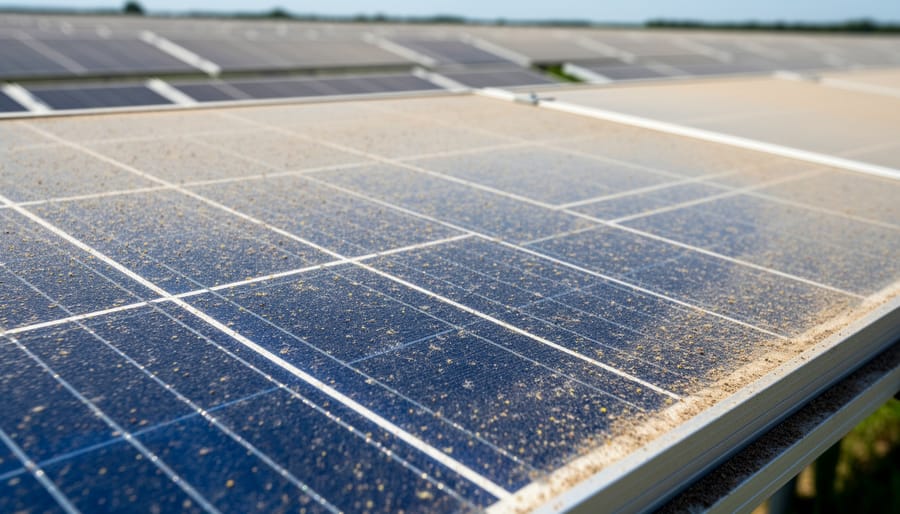
Dirty solar panels don’t just look bad, they produce less power and cost you money. When dust, pollen, bird droppings, and debris accumulate on panel surfaces, they block sunlight from reaching the photovoltaic cells underneath. Even a thin layer of grime creates shade that disrupts solar efficiency and the impact adds up quickly.
Research shows that dust can cut efficiency by 15-25% in dry, dusty environments, while coastal areas face similar losses from salt spray and humidity-related buildup. Bird droppings are particularly problematic because they create concentrated shadows that can reduce output from entire cell strings by 30-40% until removed. Agricultural areas see heavy pollen deposits during certain seasons, and urban locations accumulate industrial particulates and vehicle exhaust residue.
The connection between cleaning frequency and energy production is straightforward. A 5 kW system losing 20% efficiency produces roughly 1 kW less power throughout the day. Over a month, that’s 30-60 kWh you’re not generating, electricity you’ll either buy from the grid or simply lose as potential savings. In regions with high electricity rates, that translates to $15-30 monthly in reduced returns, or $180-360 annually.
Regular cleaning maintains your system’s designed output and protects your investment’s long-term value. Most homeowners find that quarterly cleaning keeps efficiency losses under 5%, while those in particularly dusty areas benefit from monthly attention during problem seasons.
What You’ll Need: Solar Panel Cleaning Kit Components

A complete solar panel cleaning kit requires specific tools designed to remove debris without scratching or damaging the panels’ protective glass coating. The right equipment makes the difference between safe, effective cleaning and potentially expensive repairs.
Essential Components
- Soft-bristle brush or wash brush with non-abrasive bristles, look for brushes with natural or soft synthetic bristles that won’t scratch the glass surface, ideally with a head width of 10-14 inches for efficient coverage
- Squeegee with a rubber blade, choose one with a flexible, replaceable rubber edge that conforms to the panel surface and removes water without streaking
- Extension pole, telescoping poles that reach 12-24 feet allow ground-level cleaning for most residential installations; select aluminum or fiberglass poles that lock securely at your desired length
- Purified or deionized water source, mineral-free water prevents spotting and streaking; consider a portable deionization system or water filtration cart if your tap water is hard
- Microfiber cloths, soft, lint-free cloths for spot cleaning and final touches; pack at least three to four cloths per cleaning session
- Gentle cleaning solution, pH-neutral, ammonia-free formulas designed specifically for solar panels; dish soap heavily diluted in water works for light cleaning, but dedicated solar panel cleaners handle stubborn buildup better
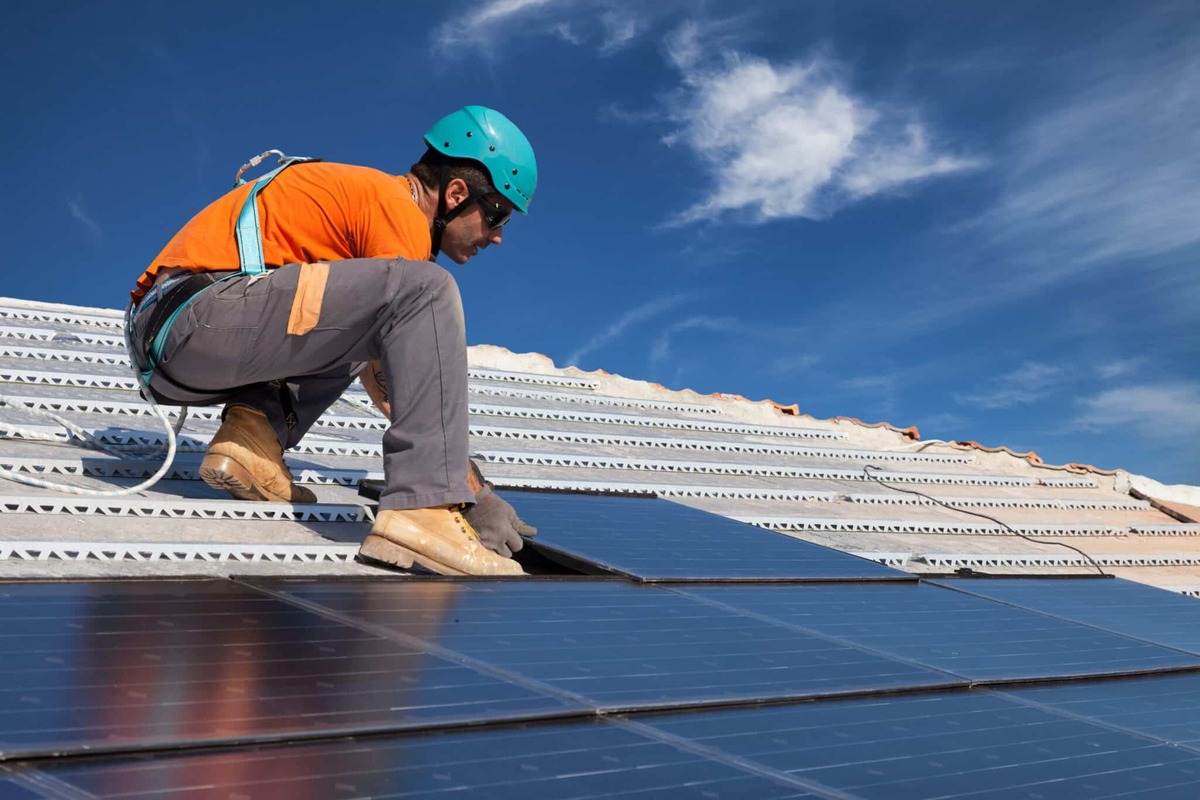
- Safety harness and fall protection, essential if you’re accessing roof-mounted panels; choose OSHA-compliant harnesses with proper anchor points
- Non-slip footwear with good traction for roof work
- Garden hose with adjustable spray nozzle for initial rinse and final wash, avoid pressure washers
Optional but Helpful Additions
A bucket for mixing cleaning solution keeps your workspace organized. Some professionals swear by water-fed pole systems that deliver purified water through the brush head, eliminating the need for separate rinsing. If you have hard-to-reach panels, consider an inspection mirror to check cleaning quality from the ground.
For panels with heavy soiling from bird droppings or tree sap, keep a plastic scraper with rounded edges in your kit. Never use metal scrapers or abrasive pads. A portable step ladder rated for your weight provides stable access to lower roof sections, though it’s not a substitute for proper fall protection on steep or high roofs.
Your specific kit configuration depends on your installation height, local water quality, and how frequently your panels need cleaning.
Safety First: Important Precautions Before You Start
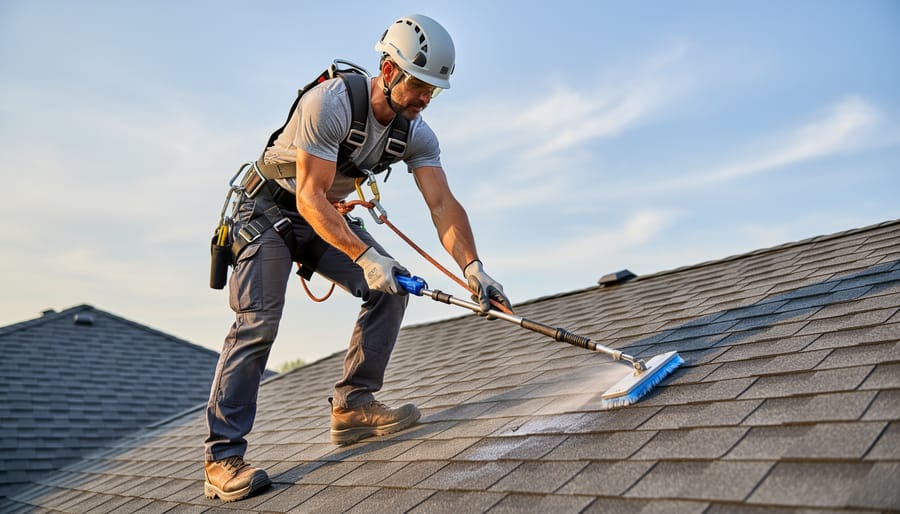
Before you begin cleaning, understanding and following solar cleaning safety precautions can prevent serious injury and equipment damage. Solar panels pose unique hazards that require specific preparation.
Never clean your panels while they’re generating electricity. Shut down your solar system completely using the disconnect switch near your inverter, and confirm the shutdown on your monitoring system. Water and electricity create deadly risks, even a small amount of moisture near exposed connections can cause electrocution.
Working at heights demands careful planning. If your roof has a steep pitch (over 6/12 slope), requires you to work more than one story up, or lacks secure footing, call a professional. Use a sturdy ladder rated for your weight plus equipment, positioned on level ground at the correct angle (the base should be one foot away for every four feet of height). Always maintain three points of contact when climbing.
Check the weather before starting. Never clean during rain, strong winds, or freezing conditions, which make surfaces dangerously slippery. Avoid cleaning hot panels during midday; they can reach 150°F or higher, creating burn risks and causing thermal shock when cold water hits them. Clean in early morning or late afternoon when panels are cool to the touch.
Inspect your panels first from the ground. If you spot cracked glass, exposed wiring, damaged junction boxes, or loose mounting hardware, stop immediately and contact a qualified solar technician. These conditions make DIY cleaning unsafe and could void your warranty if you proceed without professional repairs.
Step-by-Step: How to Clean Your Solar Panels Safely
Preparation and Timing
The best time to clean your solar panels is early morning or late afternoon when the panels are cool to the touch. Hot panels can cause water to evaporate quickly, leaving streaks and water spots that defeat the purpose of cleaning. Early morning also means the overnight dew has already loosened some debris, making your job easier.
Check the weather forecast before you start. You need at least two hours of dry, calm weather with no rain predicted. Avoid windy days that can make working at heights dangerous and blow debris back onto wet panels.
Gather all your cleaning supplies before you climb up. This includes your soft-bristle brush, squeegee, extension pole, bucket of purified water, microfiber cloths, and any cleaning solution. Place everything within easy reach of where you’ll be working.
Set up your ladder on stable, level ground. If you’re using a safety harness, secure it to a proper anchor point before you begin. Have a helper nearby to hand you tools and watch for hazards. Never rush this preparation stage, your safety depends on it.
The Cleaning Process
Start with a thorough rinse using your hose or extension pole water system. Spray the panels from top to bottom, letting gravity help carry away loose dirt and debris. This initial rinse removes surface contamination and makes scrubbing more effective while reducing the risk of scratching the glass.
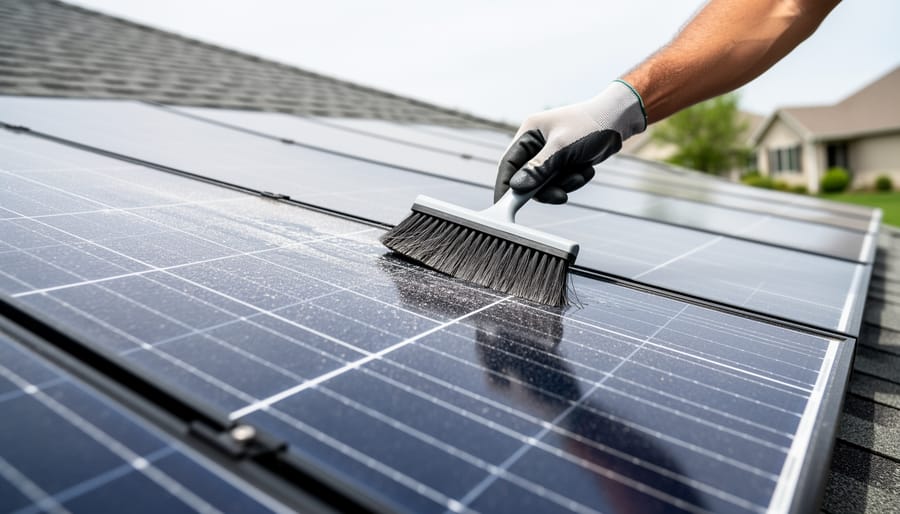
Dip your soft-bristle brush into your bucket of cleaning solution, pure water works fine, or add a small amount of gentle, solar-safe cleaner if needed. Begin scrubbing at the top edge of each panel, working in gentle, overlapping strokes across the surface. Apply light to moderate pressure; you’re not scrubbing a dirty floor, you’re cleaning delicate glass. Move systematically across each panel in horizontal passes, ensuring you cover every section without missing spots.
For stubborn deposits like bird droppings or tree sap, let water soak the area for a minute before attempting to remove it. Never scrape or use excessive force, which can scratch the protective coating. Instead, apply your cleaning solution directly to the spot and use circular motions with your brush to work it loose gradually. If something won’t budge after gentle attempts, it’s better to leave it than risk damage.
Once you’ve scrubbed all panels, use your squeegee to remove excess water. Start at the top and pull downward in smooth, continuous strokes, overlapping each pass slightly. This prevents streaking and helps the panels dry evenly.
Finish with a final rinse using pure water, again working from top to bottom. This removes any remaining cleaning solution and minimizes water spot formation, especially important in areas with hard water. Let the panels air dry completely before moving to the next section of your array.
Drying and Final Touches
After rinsing your panels, you have two options: let them air dry or speed things up with a clean microfiber cloth. Air drying works fine if you’ve used purified water, which won’t leave mineral spots. Regular tap water, though, often leaves streaks as it evaporates, that’s when a microfiber cloth becomes essential.
If you choose to dry manually, use gentle, overlapping strokes across each panel. Don’t press hard; you’re removing water, not scrubbing. Work systematically so you don’t miss sections.
Once finished, step back and inspect from different angles. Streaks show up clearly when light hits the panels. Check for any soap residue or missed spots, especially around the frame edges where cleaner can pool. If you spot problems, a quick rinse and wipe fixes them immediately.
Clean panels should look uniformly clear with no visible film or water marks.
Verifying Your Results: How to Check If Cleaning Worked
After you’ve finished cleaning, take a few minutes to verify the job was done properly. A thorough check now saves you from discovering problems later and ensures you’re getting the maximum benefit from your effort.
Start with a careful visual inspection from ground level using binoculars if needed. Your panels should look uniformly clean with no visible streaks, water spots, or remaining debris. Check the edges and corners where dirt tends to accumulate, these areas often get missed during cleaning. Look for any new scratches or damage that might have occurred during the process, though proper technique should prevent this entirely.
The real proof comes from monitoring your system’s energy production. Most modern inverters include apps or display panels that show real-time output. Note your production levels before cleaning, then check again after 2-3 sunny days to allow for accurate comparison. You should see measurable improvement if your panels were significantly dirty.
- Confirm no visible streaks, spots, or debris remain on panel surfaces
- Check that edges, corners, and frames are completely clean
- Verify no water pooling or residue in panel grooves
- Monitor inverter or app data for increased energy production
- Compare output to pre-cleaning baseline on similar weather days
- Document results to establish your cleaning schedule
Expect efficiency improvements ranging from 3-5% for lightly soiled panels up to 15-25% for heavily dirty ones. The difference depends on how much buildup you removed. If you don’t see any improvement after cleaning on clear days, either your panels weren’t that dirty to begin with, which is good news, or you may have an unrelated system issue worth investigating.
Common Mistakes to Avoid
Even with the right cleaning kit, using improper techniques can scratch your panels, void warranties, or create safety hazards. Here are the critical mistakes that solar panel owners should avoid.
Never use abrasive scrubbers, steel wool, or stiff-bristled brushes on your panels. These materials can scratch the protective glass coating, creating permanent damage that reduces light transmission and efficiency. Similarly, household cleaning products like window cleaners, detergents, or degreasers may leave residue that attracts dirt or contains chemicals that degrade anti-reflective coatings over time.
Cleaning during peak sun hours exposes you to hot surfaces that can cause burns and makes panels uncomfortable to work near. The heat also causes water to evaporate quickly, leaving mineral deposits and streaks that defeat the purpose of cleaning.
Attempting unsafe roof access represents the most dangerous mistake. If you need a ladder taller than you’re comfortable using, lack proper fall protection equipment, or face a steep roof pitch, the risk isn’t worth it. Many homeowners underestimate how slippery wet roof surfaces become, leading to falls that result in serious injuries.
Skipping the initial water rinse before scrubbing can also cause problems. Dry brushing grinds abrasive particles across the glass surface, creating microscopic scratches. Always rinse thoroughly first to remove loose debris before any physical contact with brushes or cloths.
How Often Should You Clean Your Solar Panels?
Cleaning frequency depends heavily on your specific environment rather than a one-size-fits-all schedule. Most solar panels perform well with cleaning every six months, but your situation may demand more or less attention.
If you live in a dusty region, near agricultural fields, or in an area experiencing drought, plan to clean quarterly. Desert environments and locations with frequent dust storms may require monthly inspections and cleaning. Coastal properties face salt spray buildup that corrodes connections and clouds glass surfaces, aim for quarterly cleaning to prevent long-term damage. Similarly, solar shingles and traditional panels near trees need attention every two to three months during leaf-dropping seasons.
Urban areas with heavy pollution typically need quarterly cleaning, while rural properties with minimal debris can often go six to eight months between sessions. After major weather events, dust storms, heavy pollen seasons, or nearby wildfires, inspect and clean regardless of your regular schedule.
Visual cues tell you when cleaning is overdue: visible dirt layers, bird droppings that haven’t washed away naturally, or a noticeable drop in your monitoring app’s daily production compared to recent clean-panel performance. If production drops 5% or more without weather changes explaining it, inspect your panels. During rainy seasons, you might extend intervals since rain provides natural rinsing, though it won’t remove sticky residues or hardened debris.
Frequently Asked Questions
How much does a solar panel cleaning kit cost?
A basic cleaning kit with a soft brush, squeegee, and extension pole typically costs between $40 and $80, while more comprehensive kits with purified water systems and professional-grade tools can range from $100 to $300. The investment pays for itself quickly through maintained energy production, especially compared to professional cleaning services that charge $150 to $350 per visit.
Can I just let rain clean my solar panels?
Rain helps rinse away loose dust but rarely provides thorough cleaning. Rainwater often leaves behind mineral deposits, and it doesn’t effectively remove stuck-on debris like bird droppings, pollen, or tree sap. Most solar owners in moderate climates still need manual cleaning two to four times per year to maintain optimal efficiency.
Should I clean my panels myself or hire a professional?
DIY cleaning works well for single-story installations with safe roof access and minimal pitch. Consider professional services if your roof is steep, panels are difficult to reach, you’re uncomfortable working at heights, or your system requires specialized cleaning due to heavy soiling. Professionals also carry insurance that protects against accidental damage.
Do different panel types require different cleaning methods?
The cleaning process remains largely the same across panel types whether you have monocrystalline, polycrystalline, or thin-film panels. However, some thin-film panels have more delicate surfaces that require extra care with brush pressure. Always check your manufacturer’s specific cleaning recommendations in your warranty documentation.
What’s the best solar panel cleaning solution to use?
Plain water works perfectly for most cleaning jobs. If you need extra cleaning power for stubborn grime, mix a few drops of mild dish soap with water, or use a cleaning solution specifically designed for solar panels. Avoid any products containing harsh chemicals, abrasives, or alcohol that could damage the panel coating or leave residue that attracts more dirt.
These questions reflect what most solar owners want to know before committing to a cleaning routine. The answers balance practical cost considerations with safety concerns, helping you make informed decisions about maintaining your system. Remember that your specific situation might differ based on your location, roof access, and comfort level with heights, so assess your circumstances honestly before deciding between DIY and professional cleaning.
Regular cleaning with a proper solar panel cleaning kit is one of the simplest yet most effective ways to protect your investment and maximize energy production. By following the safe, systematic approach outlined in this guide, you can maintain peak efficiency without risking damage to your panels or yourself.
Establish a cleaning schedule that fits your environment, whether that’s quarterly cleanings in dusty regions or semi-annual maintenance in cleaner climates. Monitor your system’s performance regularly, and don’t hesitate to clean when you notice production dips or visible buildup.
If roof access concerns you or your system requires specialized care, professional maintenance is worth considering. Ask Solar connects homeowners with qualified local solar service providers who can handle everything from routine cleaning to comprehensive system checks, ensuring your panels perform optimally year-round. Whether you’re maintaining your solar energy certificate requirements or simply protecting your long-term savings, consistent panel care keeps your solar investment working hard for you.